Option #1: Use Custom Menus for Greater Flexibility
Although using custom menus adds an extra step to menu management, we recommend using them for the additional flexibility.
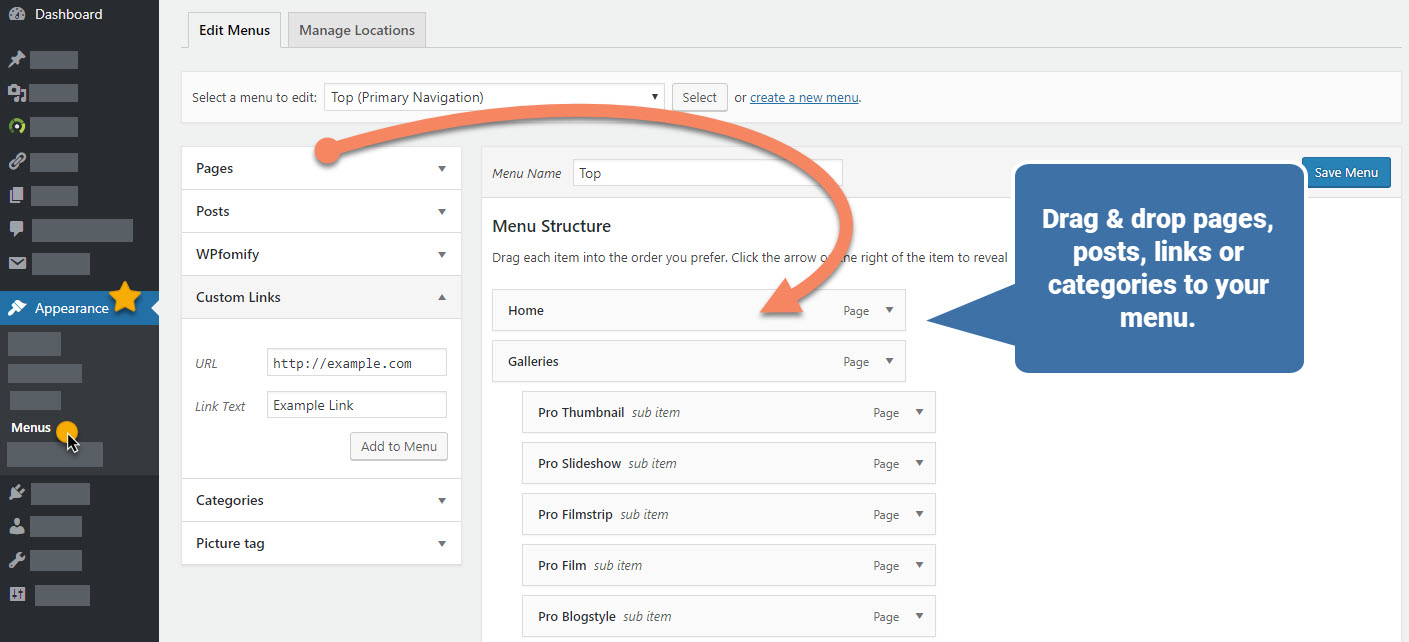
- Overview. Pages will no longer appear automatically on your menu. You must go to Appearance > Menus > create a menu > add the pages you want, and drag and drop to arrange. Return to add new pages to your menu later.
- Header and Footer menus. You can now create header and footer menus. Set your header menu to "Primary". If you want a footer menu, create another menu and set it to "footer."
- Sub-menu items and dropdowns. You can make any page a sub menu item by dragging it under another page and indenting it a bit.
- Ordering your menus. Drag and drop menu items to re-order them.
- Adding links to other sites. You can add external links. Use the "Link" box - add the URL, the name of the menu item, and click create.
- Exclude pages. To exclude pages, just leave them off the menu.

Option #2: WordPress Adds Pages to Your Menu by Default
Unless you use custom menus, WordPress will by default add all your published pages to your site menu.
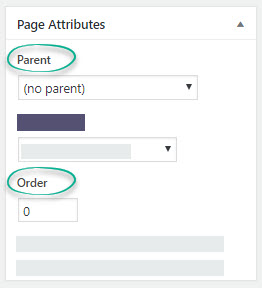
- Sub-menu items and drop-downs. You can make any page a sub menu item by giving it a "Parent." When adding or editing a page, look on the far right, under the Publish box, for 'Page Attributes' setting.

- Ordering your menus. You can order your menu items by giving each item an "order" number. When adding or editing a page, just look on the far right for the "Order" field and enter a number. ALL pages must have an order number for this to work.
- Adding links to other sites. You CANNOT add external links unless you use custom menus - see above.
- Exclude pages. You can exclude pages by installing a plugin exclude pages plugin. *Because third-party plugins are developed and maintained by other developers we cannot guarantee compatibility, nor can we provide support for them.