To begin, you’ll need Photocrati Pro 5.0.9 beta installed and activated and NextGEN Gallery installed and active.
*Update* As of WordPress v5.0 WordPress has included a new post and page editor interface called ‘Gutenberg’. We have included a NextGEN Gallery block in our December 2018 update. Follow the steps below to access our Add Gallery Window. If you prefer to continue using the Classic Editor, follow the instructions below this video:
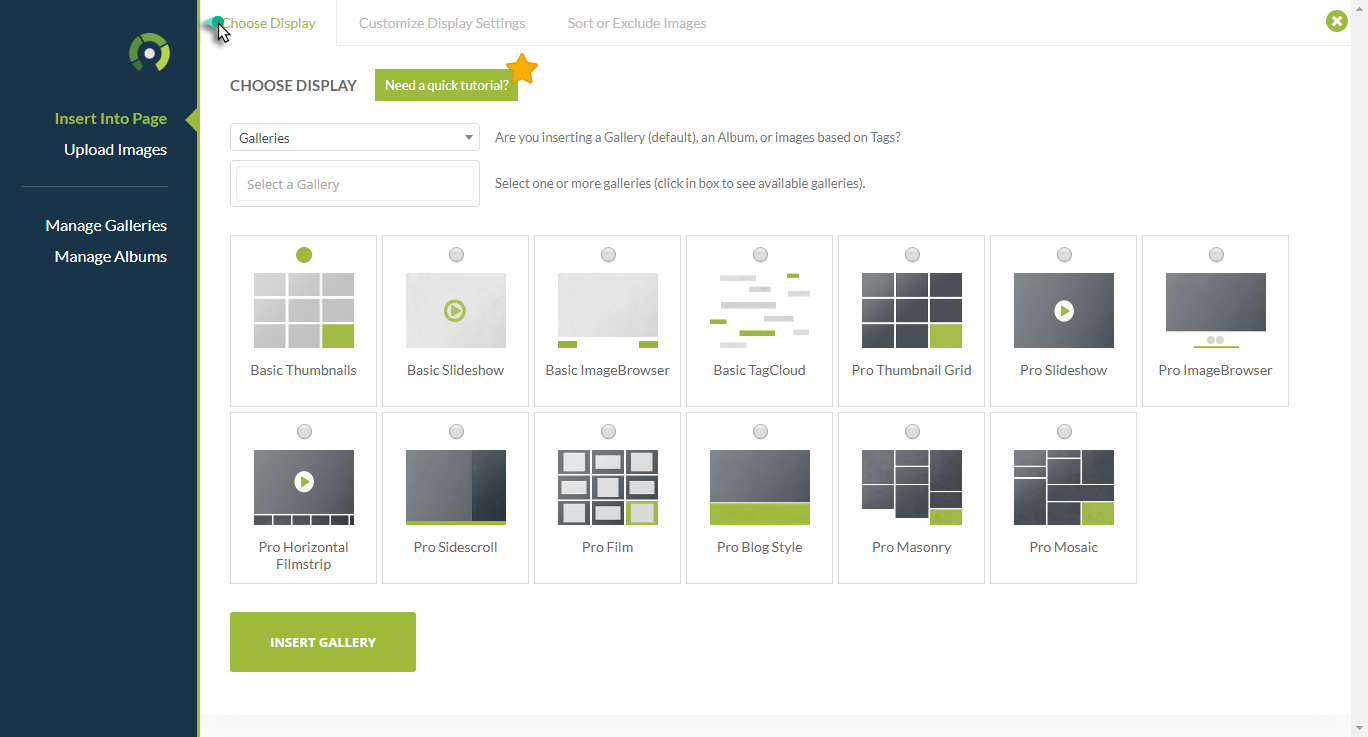
ADD GALLERY WINDOW FEATURES
As of WordPress v5.0 you will need to install the Classic Editor plugin to continue editing your posts and pages the way you have been used to, following the instructions below. If you’d like to use the new Gutenberg editor, follow the instructions above in the video to learn how to locate our NextGEN Gallery block, and access our Add Gallery Window.
—
Search & Install
Navigate to Plugins > Add New, search ‘NextGEN Gallery’…

Click ‘Install Now’, and Activate…

IMPORT Photocrati Galleries to NextGEN
To import your old Photocrati Galleries and re-create them as new NextGEN Pro galleries, follow the steps below:
- Go to Gallery > Add New Images/Galleries & select the tab ‘Import Photocrati Gallery’
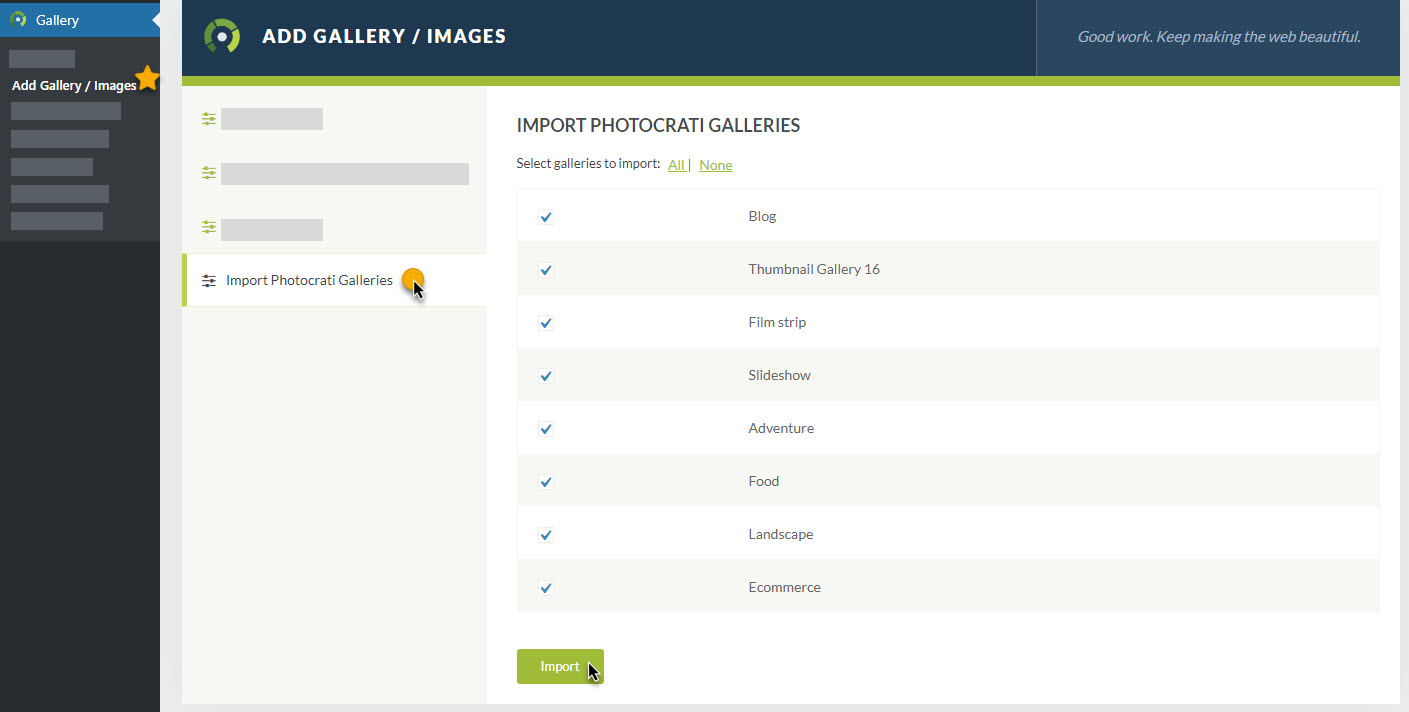
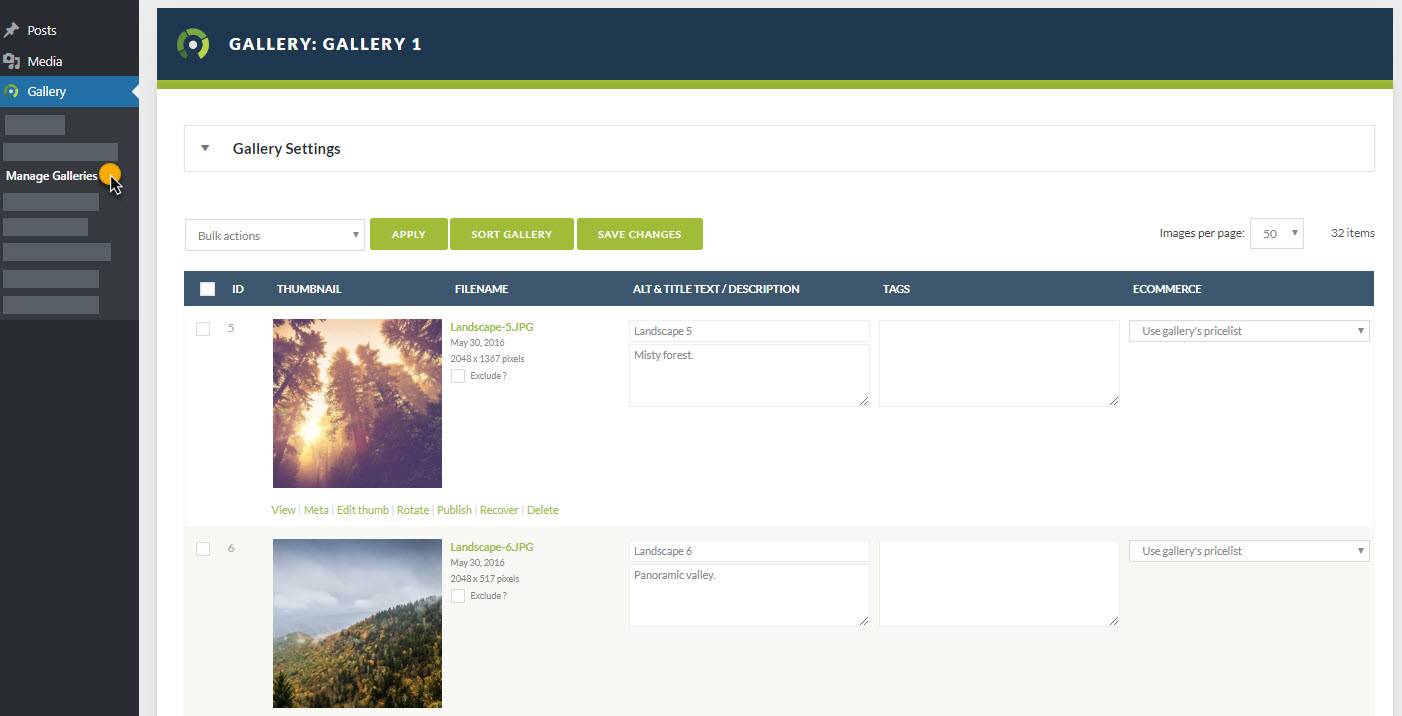
- Select the galleries you wish to import and click ‘Import’. When the progress bar reaches 100% Complete! Click Gallery > ‘Manage Galleries’ to manage your galleries…
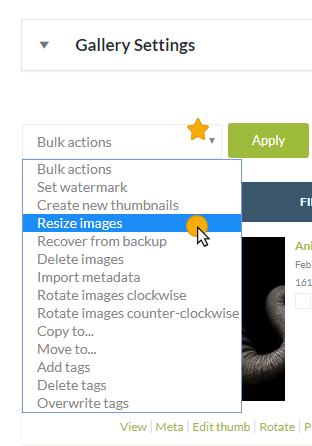
- After clicking on ‘Manage Galleries’ you may now edit thumbnails, rotate images, resize images + more 🙂
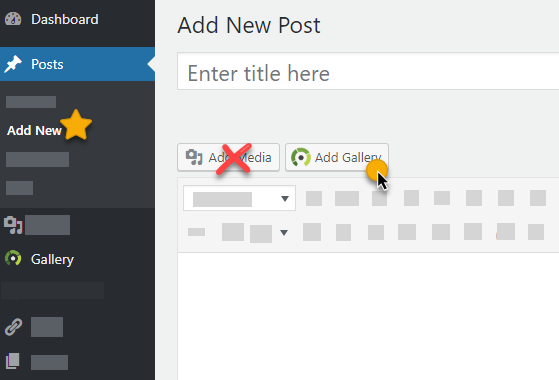
- Once you have all of your galleries imported, go back to your pages and posts and replace the old Photocrati galleries with your new NextGEN galleries!

Click Here for More Help With Managing Your Galleries
*If you’re running Ecommerce on your site, you will need to re-create your pricelists. For help on that follow this guide: How to Create a Pricelist
More help on Ecommerce set up can be found here: NextGEN Pro Ecommerce
