When preparing your images for the web it’s important to keep in mind the performance and load time of your galleries and site pages. If you upload and add full resolution image files to your site galleries, it weighs down the load time and you’ll have very slow galleries and slow loading pages. The filesize is the main culprit for the performance of the gallery, and the color profile can play an issue in the quality of your images after upload. We’ll go over this in our recommendations below. First, we encourage you to review this article on image compression:
The Ultimate Image Optimization Plugin Comparison for Photographers
IMAGE DIMENSIONS
For the best performance, we recommend resizing your images to no larger than 1920×1280. It’s important that you export your images from your photo editing software with the sRGB color profile. This will ensure that your colors keep intact after you upload your images. You, of course, can upload larger than 1920×1280 images, but if you do, please refer to the image optimization article I listed above.
WORDPRESS DEFAULT IMAGE COMPRESSION
By default WordPress sets image quality to 80% to optimize the performance of the media load time. To change this default image compression we recommend installing a plugin like Disable JPG Compression to automatically switch the 80% setting to 100%.
FILE SIZE
The dimensions of your images are important, but what is most important when considering the load time of your images and galleries on your site is the file size. We have compiled a list of our recommended apps to use to help reduce the file size of your images while keeping the quality of your images intact. 🙂
Digital Downloads?
If you’re offering digital downloads to your customers you will need to upload your full-resolution images, and NextGEN Gallery will resize them for you. Before uploading, make sure that ‘resize on upload’ is turned ON and ‘backup images’ is turned ON under Gallery > Other Options > Image Options. To learn more about setting up your pricelists and options for Ecommerce, check out our documentation here.
Please, take these into consideration before uploading your files:
- Use JPG as the File format.
- Use sRGB as your Color profile.
- Dimensions: Full-resolution means the max size available for sale or download on your site. Try to upload a realistic size, you can use this Minimum resolution table as a guide to provide the correct dimensions, but for example, a 2250×3750 pixels is okay.
HOW TO RESIZE YOUR IMAGES
Sometimes you would like to resize your photographs to another size.
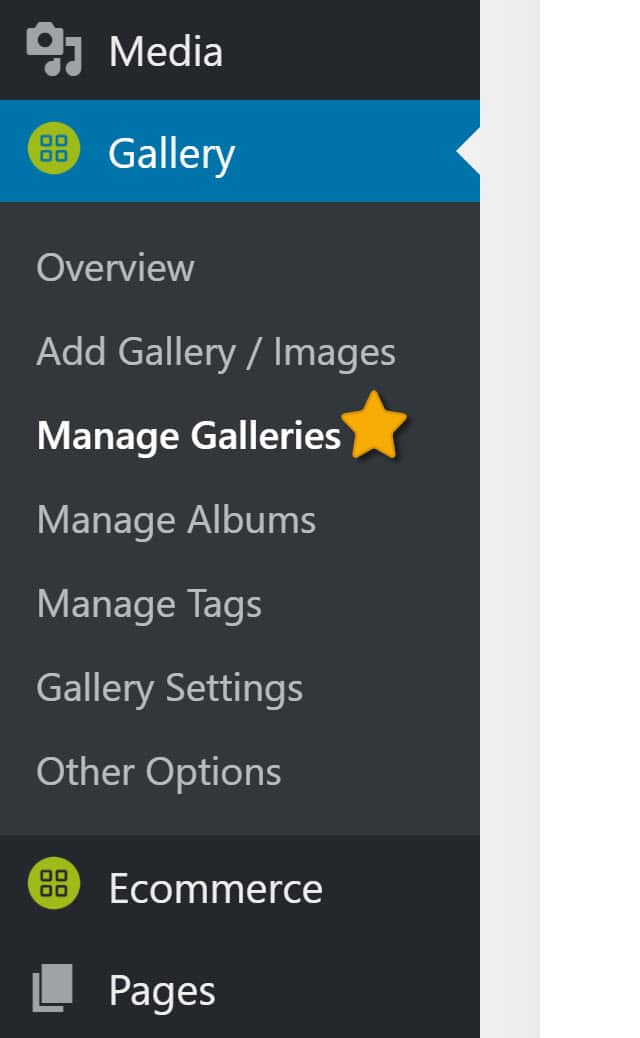
1) After uploading your gallery, go to Gallery >> Manage Gallery > and select the gallery you wish to edit the images.
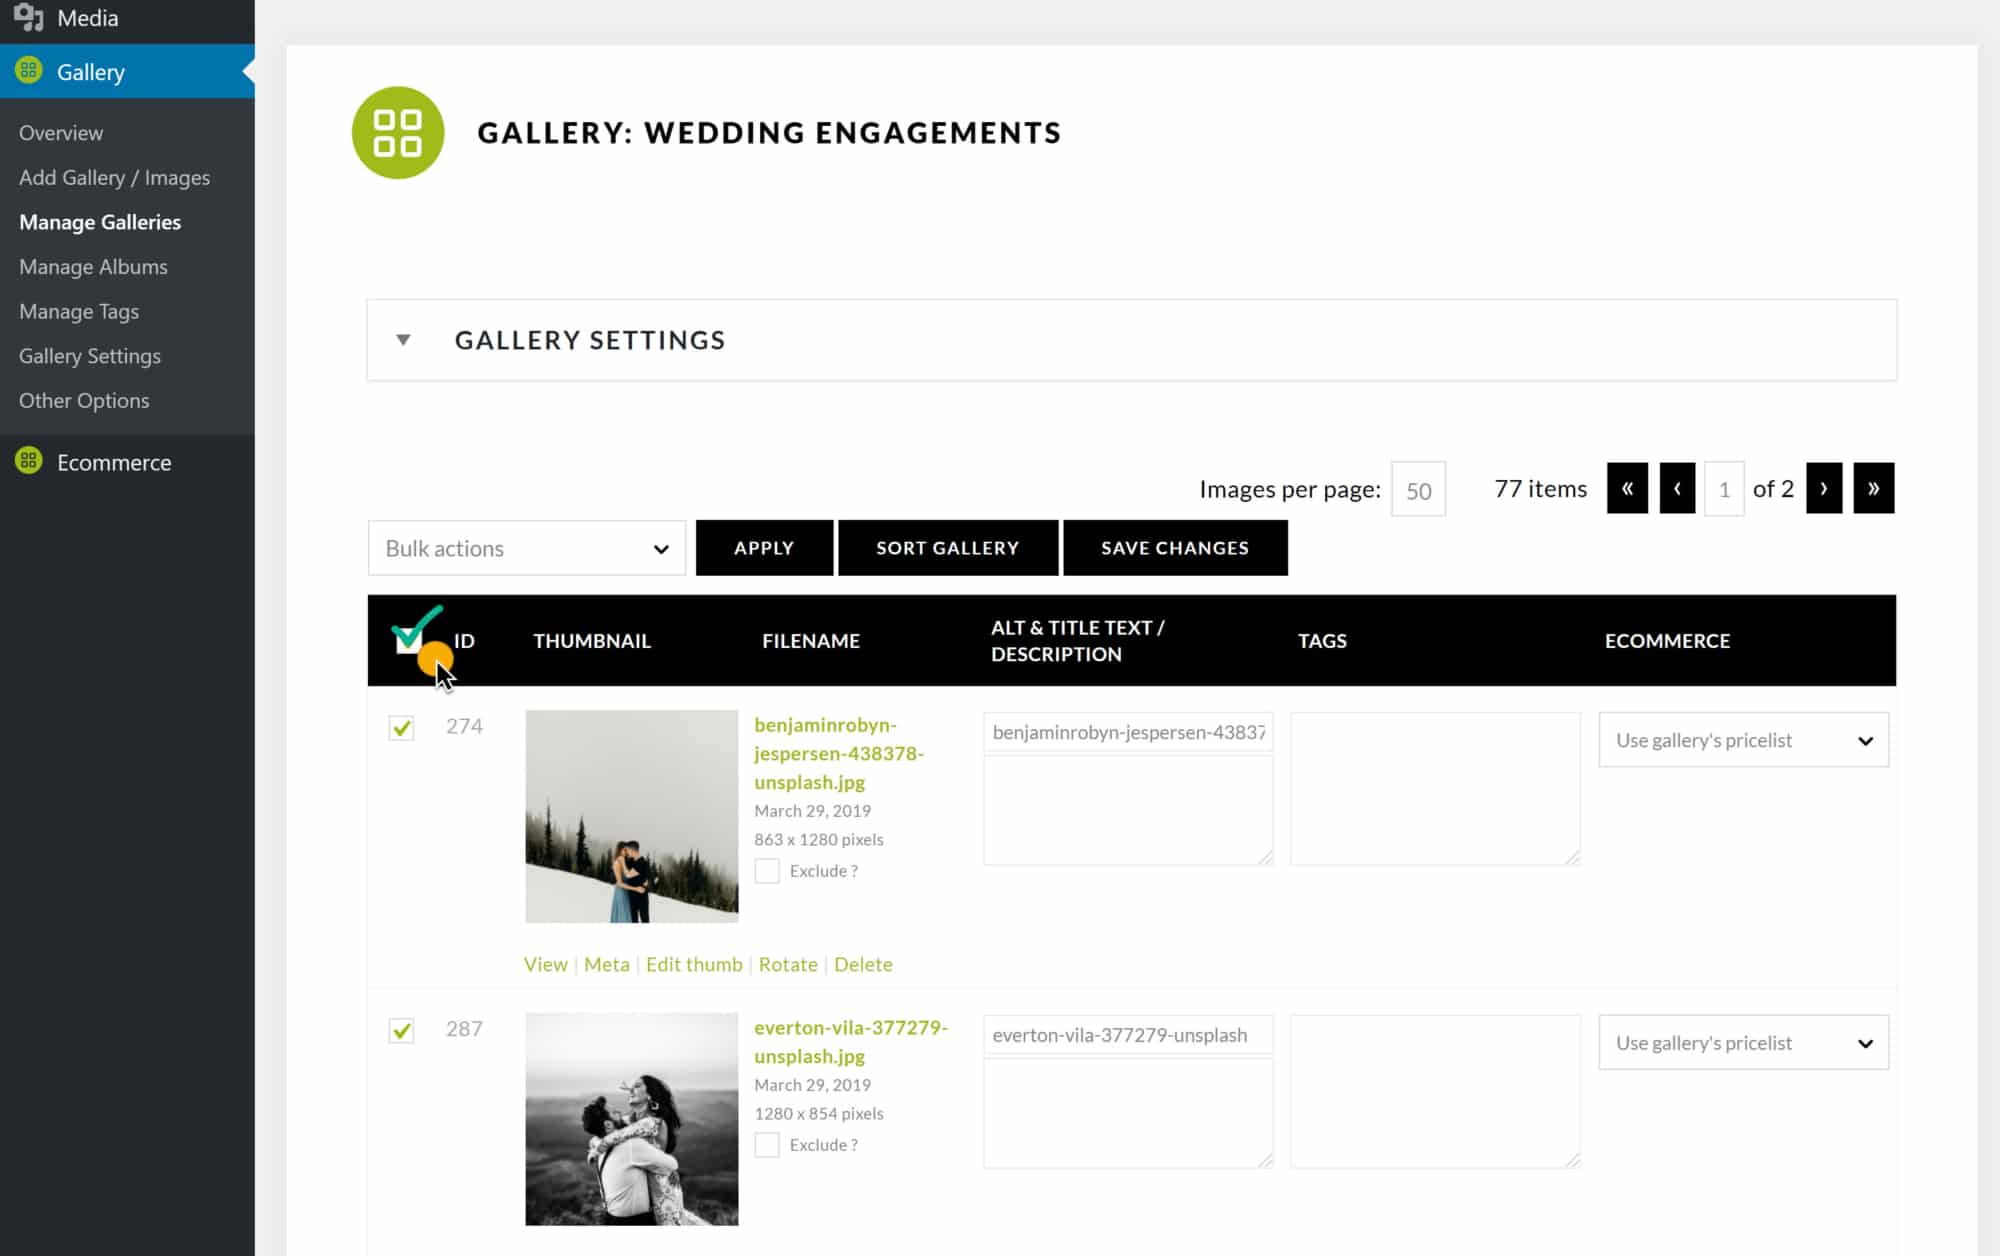
2) Select the ‘all’ selection box here, or you may choose to select and modify a single image at a time, in which case you would select the box next to the single image you wish to edit:
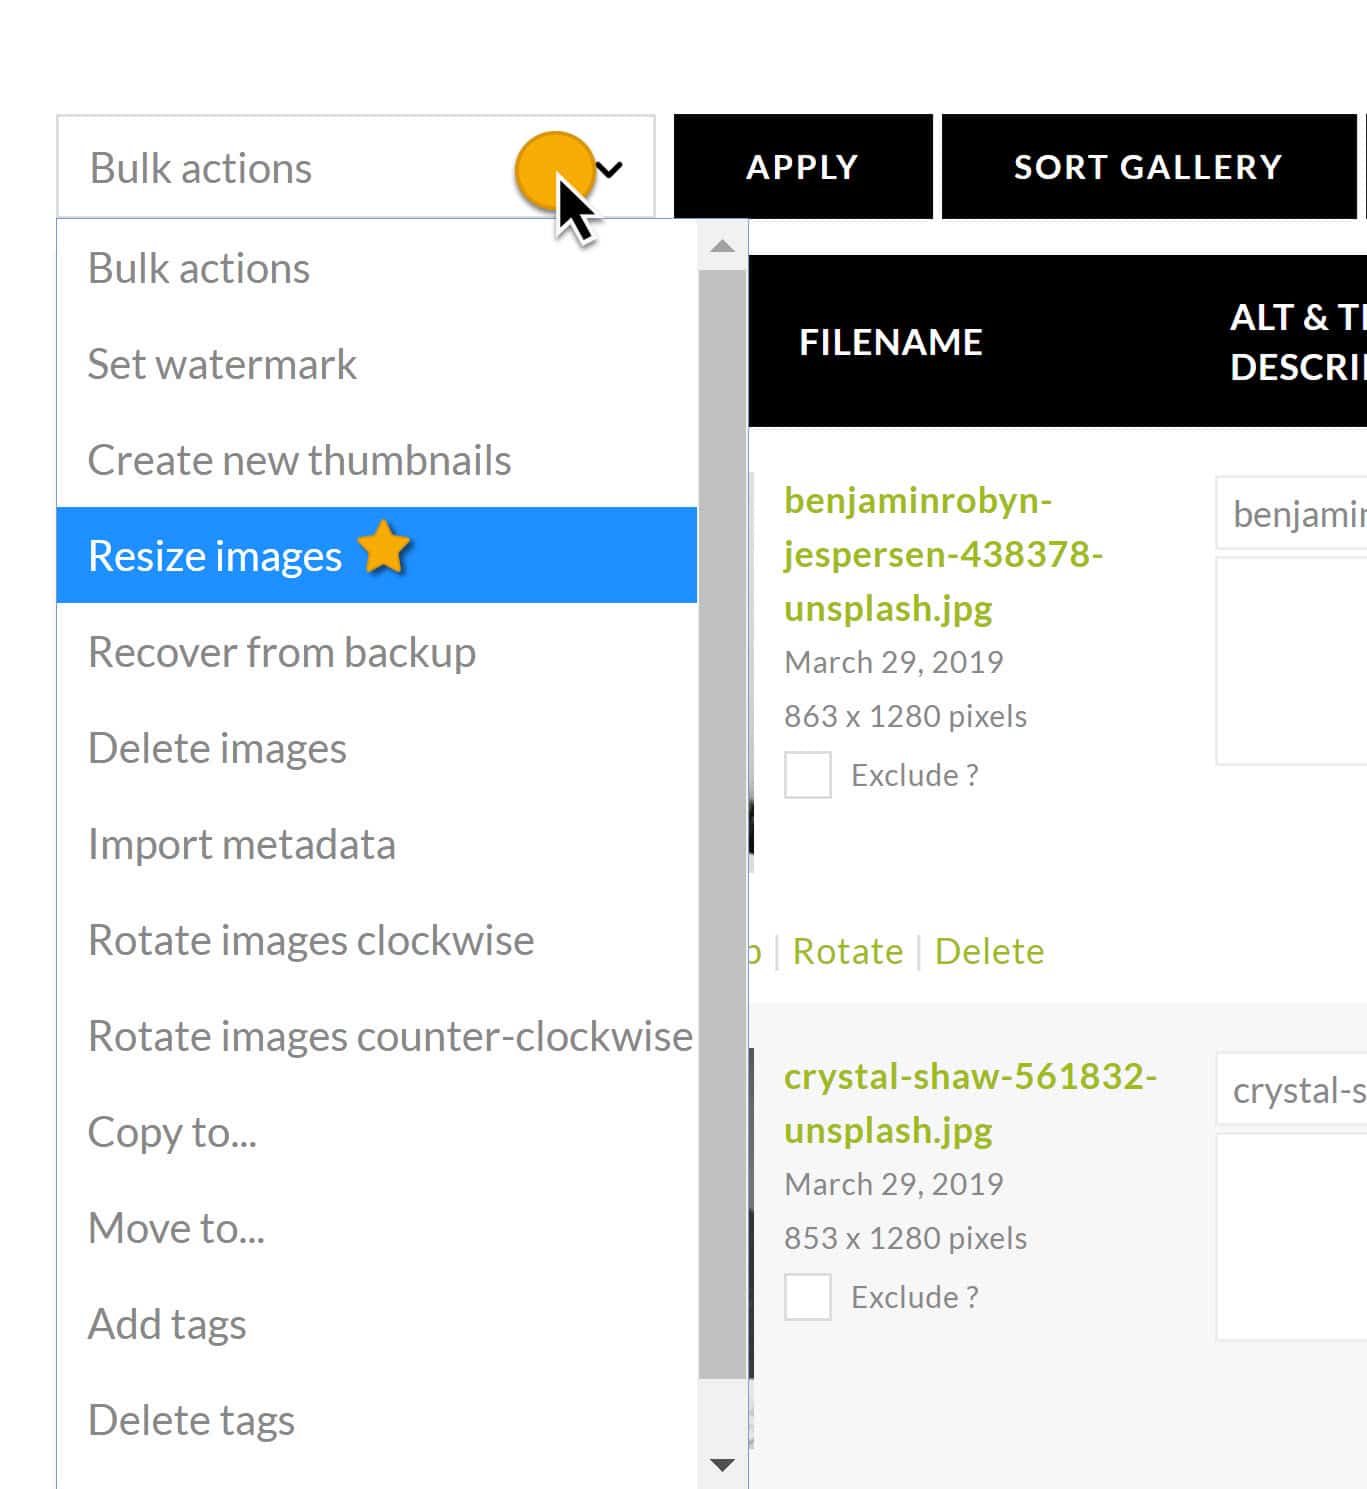
3) Select in ‘Bulk actions’ dropdown, the option to ‘Resize images’ and then click the ‘Apply’ button.
4) A pop up window will appear where you can set the width and height of the image. NextGEN Gallery will keep aspect ratio intact. Once you are done, click ‘OK’ and NextGEN Gallery will make the changes.
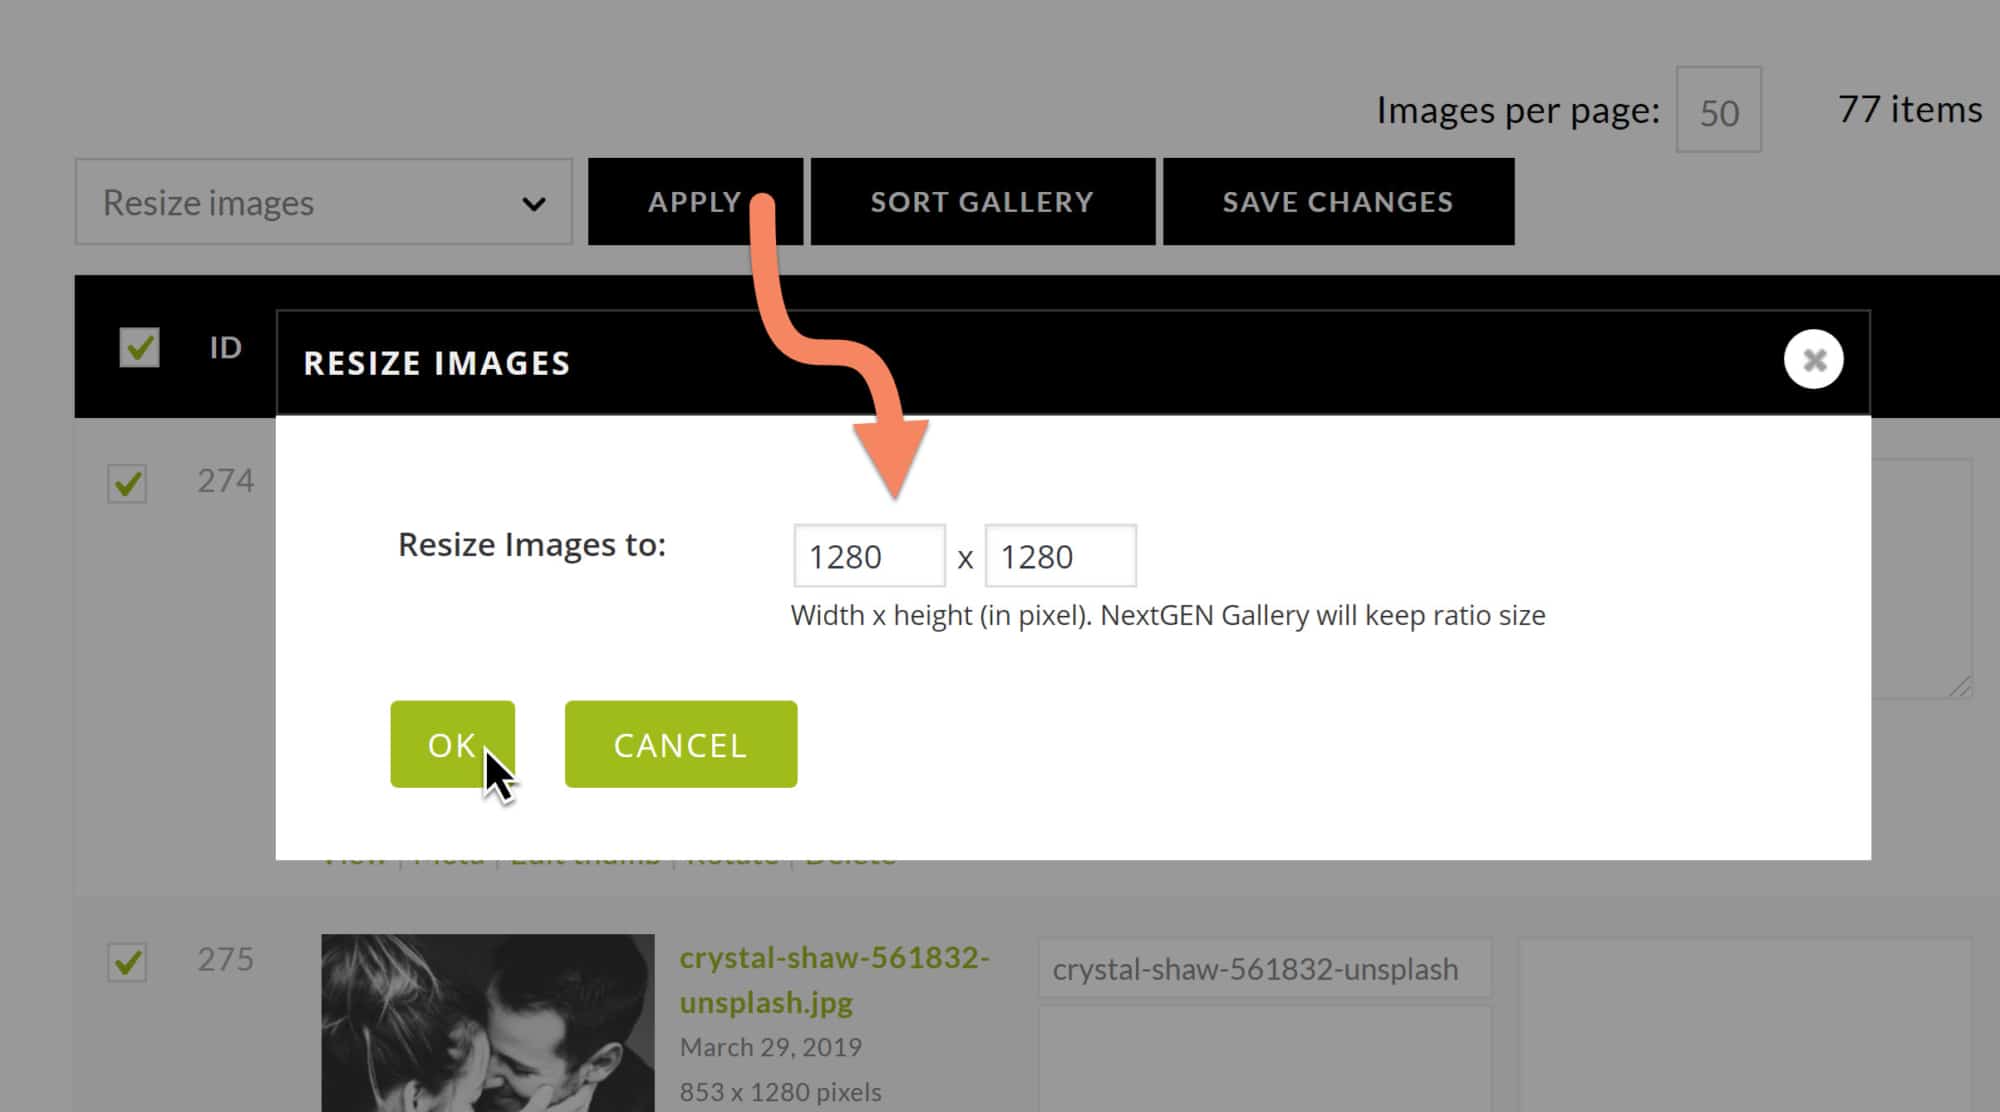
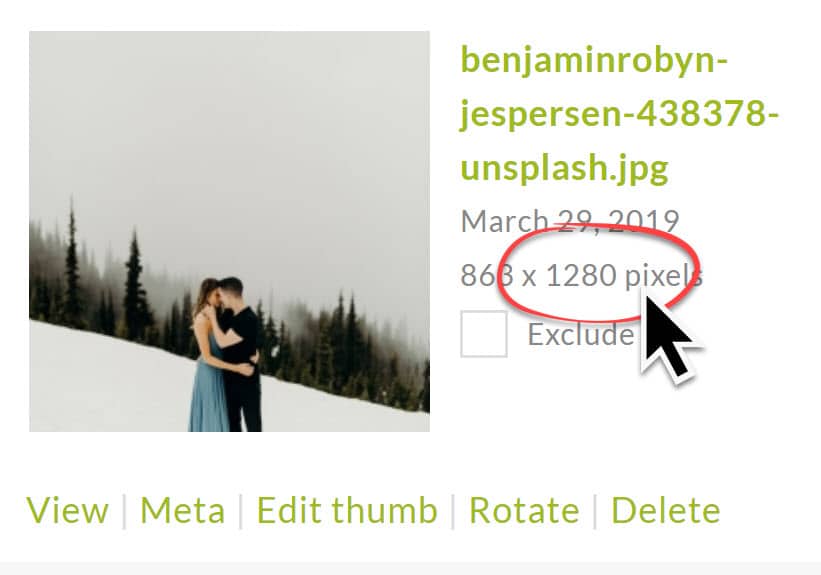
5) Once the process is complete, you should see the updated image size under the image information as shown in this screenshot:
6) Save changes and you’re done!